Blog Design by Blogs Fit for a Queen. Powered by Blogger.

How to Stop Interrupting in the Classroom


Hi friends! I wanted to share one of the most used resources that I have ever made. 
If you don't have students that interrupt, share your secrets in the comments!
Interrupting, especially in first grade, is always an issue. Kindergarten is not a requirement in many states, so it is possible that a child's first full time experience could be in first grade.


This post contains affiliate links for Amazon. By purchasing an item on the Amazon site using these links, I will receive a small commission on your purchase. This allows me to keep my teeny little blog up and running. 
Interrupting is a true problem in a primary classroom. Students need to practice deciding when is it ok to interrupt the teacher. When is my problem a problem I can solve? How can I solve my problem?
This activity is made to have students working together in small groups. They are to sort the scenario cards into two piles. You can decide which are ok in your personal classroom. I have included 48 scenarios. Is it ok or not ok to interrupt.
I have included letters to add to an anchor chart for:
Interrupt? Yes No
Ok to interrupt
Not ok to interrupt

Students will then decide how to problem solve the ones that are NOT ok to you as a teacher. I have my students come up with two ways.


I placed these signs on my table during guided reading and my students will then ask a friend for help or look at the anchor chart to see if what they need is something important enough to interrupt. 
Sometimes I think I want these in my real life to show my husband - just me?lol

I love how these were used in a sensory bin for an additional layer to the lesson. 


 You could very easily do this in a small group at your guided reading table as a lesson, instead of working whole group. That way you can focus in on students who may need to go over these routines a bit more.
Working together really helps the children to understand that they CAN help each other out in so many situation. It allows them to become independent problem solvers. 


I am sure to save the lesson for January when we come back from winter break because many need a refresher. Their answers are always so much better once we come back. 


I feel this review about my resource on so many levels. I used to feel like I was going to jump out of the window with interruptions, but I don't any longer.


Here are some of the books that I use throughout the first month of school to get the conversation going about interrupting and tattling. They are all fantastic. I wish there were more! If you know of more, leave a comment below. I love adding to my collection. Click on the picture of the book to be taken to the book title directly.


Pinterest Email Teachers Pay Teachers Instagram Bloglovin' Periscope Image Map

Word Work Using Magnetic Letters

Hi friends
I wanted to share a permanent spot for Puzzler for what it is and how it works in the primary classroom.


This post contains affiliate links for Amazon. By purchasing an item on the Amazon site using these links, I will receive a small commission on your purchase. 

Do you use magnetic letters in your classroom? I use magnetic letters in my class A LOT. I mean, a lot.  I use them during morning work for some students. I have some students use them during center time or stations. I have my students use them daily during guided reading time. Magnetic letters are something that are used multiple times a day - EVERYDAY in my classroom.


Click the picture below to go to my TPT store to see the sheets.


This letter return board has saved SO much time. My kids are actually getting better at letter identification, AND they are getting FAST at it. With special needs students, pre-k and kinder babies - this is HUGE! 

If you click on the image below, it is going to take you to where you can get the magnetic boards that they go on.  These boards are double sided dry erase and magnetic. The best part is that they are PRIME on amazon, so you don't need to wait weeks to get them, like I did! 


I have had many people ask, what else do I use these letters for to make the purchase of boards and letters worth it? YES!!!

My students also play puzzler. I have many packs for puzzler. They range from word families, to sight words. This particular set is for our students working on letter sounds. Medial, Initial and Ending. Students pick a picture card, then, they look at the chart for the secret letter (they really can be confusing), then they have a bunch of mixed up letters. They must fix them to become a new word. 
Students are able to use the cards for letter identification and matching if they wish. They may not be ready for the "puzzler" part of the game. They can grow to that. 


Each template has three options. It has the word fully provided with tracing dots. The second template has just the letter that the student is looking for in the puzzler card. The last template is blank for those students that are ready for fully independent practice. 


I have included mini labels for students to easily find and return their packs to the correct Iris bin. They are can also be organized into zip lock baggies as well.
Each set is organized by a theme. Each card is color coded and labeled so that lost cards can easily be returned to the correct boxes and bins.


Click below to be taken to this tray from Amazon. You can find it at IKEA, but it is over an hour drive for me.


You can find instagram videos and highlights where I go into detail about how to use it, set it up, and videos of it in action. Click on the instagram link below. 


Do you own Puzzler? I'd love to know how you organize and set it up! 


Pinterest Email Teachers Pay Teachers Instagram Bloglovin' Periscope Image Map

Managing Volunteers in the Classroom


Hi guys! I wanted to share how I manage volunteers in my classroom. I made this video two years ago and the only thing that is different is that instead of bringing parents in my classroom to explain how everything works, I send home these editable forms that have all the directions.  They go home with the parent if it is a home volunteer or they go in the basket for parents to look at when they are in to help. 

Click below to watch the video. You can click here or the picture at the top to grab these forms at a discounted rate! 


I also use this FREE copy form as well for my copy parent. I pop these on my assignments and they stay there forever. I never have to redo them or use sticky note after sticky note. 


Below is the blog post that went with the pack so you can see more that is included in the bundle. 
In my classroom, I try to be organized. Not just on the eye view but actually when you look deeper into things. If you open a space that looks organized on the outside, I want it organized on the inside too. In order to have a smooth start of the year, I need my parents to be on board with everything I present. First impressions go a long way and it really sets the mood for the year. If I'm organized and look well prepared, we start off with a lot of trust and certainty and I'm able to let them feel confident they have the right teacher. 


First, when parents come in, they should feel guided and know what's going to happen while they are here for 40 minutes. There are always going to be early arrivals, stragglers, and lingerers. Be prepared for this.  


I have clear frames that were given to me, but I have seen them 5 for $5 at walmart,  that have directions, starting at the door with the sign in sheet. It has directions on where to go next. I also have a checklist and bucket of pens there as well. This lets parents know right at the jump not to stray into parent conferences and that they have a job to do. On my checklist are all the things I need from them before they leave in our short time together. We have many forms we need and if I send them home, they will slowly trickle in. I'm a get it done and in kind of girl. 


What are the forms I have them fill out? 
Info sheet- about the parents, email addresses and ER contact. Yes, the office has it but that is a process. I want my own. I list who I can send homework home to if their kid is sick and primary email address info because this is how I communicate. No newsletters here 

Clorox wipe form. We aren't allowed to use Clorox wipes unless we have a permission form 

Pg movie release. We teach penguins and Hawaii and I like to show Happy Feet and Lilo and Stitch. These are PG movies, so I ask permission right away so I don't need to worry. 

I also do a picture form. Asking if its ok to photograph their child. This year, I'm doing an instagram account for parents only. So ill have that included in my form. 


We work with food on occasion during science so I want an ok to use food form signed. 

All about you form where they tell me some things about their child that maybe I won't see at first. It's a nice I e breaker and I can see quickly who my over the top parents are too. It prepares me for how conferences may go. 

All the forms are in a folder with their child's name on them. 
That way if they don't come or don't hand them in, they come back organized and I just put the folder right in my cabinet. 
All papers I need back are on colored paper. All sheets they can keep are on white paper. It makes it easy to see if I am missing something that a parent is trying to take home with them. 

Next - I have the clear frames all around my room with various
Things they need to do for me. I have one for each of the volunteer jobs I have. I am in a very big volunteer school. Last year, I had 16 volunteers!! 
I have the following sign ups:

4 room moms to plan parties, organize teacher appreciation and field day.

Thursday folder mom- I take as many as want to come in. They stuff our weekly school folder with all the "school mail" I then make a schedule and rotate them all year. If they can't make it, they call each other to swap. It's awesome. 

Friday copy moms. I try to only take 4 so that I can know they won't mess up and I can trust them. I use my copy forms, but then I have a time these volunteers come back and I show them the copier and how to use it. 

Monday math volunteer - they come in early during morning work and either do flash cards, math games or help with my behavior reward system based off behavior and clip chart. 

Open volunteer (this is a favorite) this is my on call volunteer. If someone no shows or cancels, I can call in a pinch and they can arrive in 20 minutes. This is usually a stay at home mom and has been a lifesaver for me!! 

Lunch volunteer. The first week is nuts. The kids don't know their lunch numbers, they have never eaten in the cafeteria and I need MY lunch kid free. These moms volunteer to each come in for the lunch each day to help them get situated. 

Home projects - putting scholastic orders together, sharpening pencils, cutting out lamination, putting booklets together. You name it. 

Craft helpers- this is once a month we do our hallway bulletin board crafts and I have this parent take down the old, file it in the kids folders and ensure current month has names on and they go up. They also help kids put them together, or cut tissue squares etc. this one gets them INTO my room so it's popular. 

I also have a scholastic form that goes home in order to those awesome points from Scholastic. There hasn't been a year without this form that I didn't get the 10,000 points! Whoot! 


Conference sign ups. I have a calendar out with my 15 minute window sign up sheets. I also give conference reminder forms they can take. That way they have my email and reminder about their time. 

Here is the Table of Contents that has all the forms and items that is included in this pack. If you were on the fence about this pack, I hope this post helped you decide to go for it!

Wow, this was a super long post! I hope you are still with me! Please head over to my TPT page to scoop up this pack before it increases to its full price. I will be adding to this pack as I get suggestions too. Leave a comment with your ideas!
Pinterest Email Teachers Pay Teachers Instagram Bloglovin' Periscope Image Map

Classroom Remodel Tour 2017

Hi yall
The last few weeks of the school year always seem to be when I kick into high gear about decluttering. I got my facebook timehop the other day and it said - "Yes, 14 days before school lets out is the perfect time to rearrange the room". Apparently, it is what I do. This year was no different.

As I update and remodel more - I will put more pictures up! :) 
This post contains affiliate links for Amazon. By purchasing an item on the Amazon site using these links, I will receive a small commission on your purchase. This allows me to keep my teeny little blog up and running. 

I have had SO many people ask about my room, that I thought I would do a blog post for you guys so you can PIN AWAY!!! :)

I decided that I couldn't take the cluttered look any longer!  If you want to see the evolution of my room, go to my classroom tour to see all my pictures of before and after.

It has always bothered me that our district didn't give you much in the way of built in storage. As I talked to my father in law about how I hated not having storage, he said  - "hey kitchen cabinets might be the way to go". I thought  - well, people are going to think I am insane. Then I thought more and honestly, most people in my building already think I am over the top about my room so would anyone even notice a few new items?!
Now, I am THRILLED because my room is everything I had imagined it could be.
Off to the tour...


My teacher space makes me so happy.  Here are a few things that you should know. 

1. Everything must come out of my room over summer. It all goes into the hallway so that they can clean.  
2. I have had two back surgeries, so dragging all my junk possessions into the hallway myself wasn't going to work anymore.  Enter casters. 
3. My cabinets are from Amazon. (You can find them here or by clicking the picture below.) They were only $88.00 each.
 * Disclosure - they were a HUGE pain to get, but in the end worth it. You can only order one, so I had to have friends get the rest and have them sent to school. 
They were easy to bulid. They don't have a back, but my handy father in law added a wood back to them. ( the two that look lower haven't had the casters put on yet.)
4. My father in law put everything on casters - every piece of furniture that I could. 
The casters I got are multidirection (360 degree) from here.
These will allow me to PUSH everything out of my classroom and not drag it through my classroom, hurting the floors and my back. 


I use the teacher toolbox above and below.  This toolbox keeps EVERYTHING that I use just about daily. I love that they are all the bigger drawers. I need big drawers, as I don't use as much small stuff - or let's just say, I have so much small stuff, that I need big drawers. 
I love my toolbox, I got it here. Click the picture below to find the labels for the toolbox. 
I also have a regular toolbox, that is blue and you can find that one here


These 3 drawer bins have been kept me organized. There are two sizes. One is a larger paper holding drawer set. You can find it here.  The labels are from here. The other is a three drawer set that is smaller and hold things like pens and pencils.  You can find the smaller ones here.  The labels are from here. I keep all of my writing utensils here. I have a TON and they all have a home.  Click the picture below to find the bundle of labels. 


 The cabinets below are incredibly nice. They were not cheap at $150.00 each. I had a gift card, otherwise, I wouldn't have purchased these. I would have gotten more of the amazon ones. The stuva ones to the right have been discontinued but they should be brought back once the tipping hazard is fixed. Find the galant ones here.

The galant series are very well made. They do not have casters. My father in law put casters on these ones as well. 
Inside, they house ALL of my curriculum for Math, Science and Social Studies. I use Iris project cases to hold all of my curriculum. They have been a GAME changer. I have used the filing cabinet. I have used binders. These have been worth the investment. 
You can find the cases here or by clicking below. 


 This is my focus wall and word work area. 
This is my newest area that I have reorganized. 
*the tall drawer cabinet piece is the Ikea Stuva. It has been discontinued, but they should have it back once the tipping hazards are fixed. This is secured to the wall. It holds my printer at the top. It holds my printer paper, and construction paper. It also holds all of my laminators, electric three hole punchers, and my electric staplers. It also holds my actual tools to keep all of my stuff tightened. 
*My table is from Amazon - you can find it here

My focus wall is the FIRST thing that my students look at when they are writing or reviewing. The black clear pockets are both horizontal and vertical (even though I have that digraphs poster in the wrong spot) You can find the horizontal ones here, and the vertical ones here

 The grammar posters are from here.

The shelf below is the Kallax shelf.  I just turned it on its side and put on casters. You can find the Kallax here.  There is a cheaper shelf available here but it isn't ikea. You can find it here.

The containers are from Big Lots, but you can find them here
You can find the labels here
I have been asked what goes into the bins. Here are a few things:

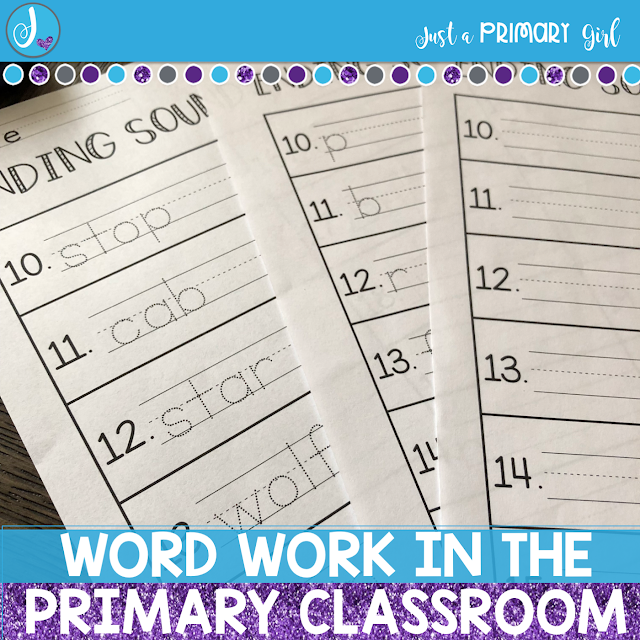
Word Work Task Cards
start with level A-1 and go up through level C-3. Each card has five words. Set one starts with only substituting the ending sound. Set two substitutes either the first sound or ending sound, while each word only changes one letter at a time. Set three can substitute any sound in the word, still only changing one letter each line. Each set has 45 words - with 135 cvc words in the entire pack! 
The boxes are called Iris Photo boxes
I used the rings to keep my cards together. These small rings make it so that they fit easily into the task box containers

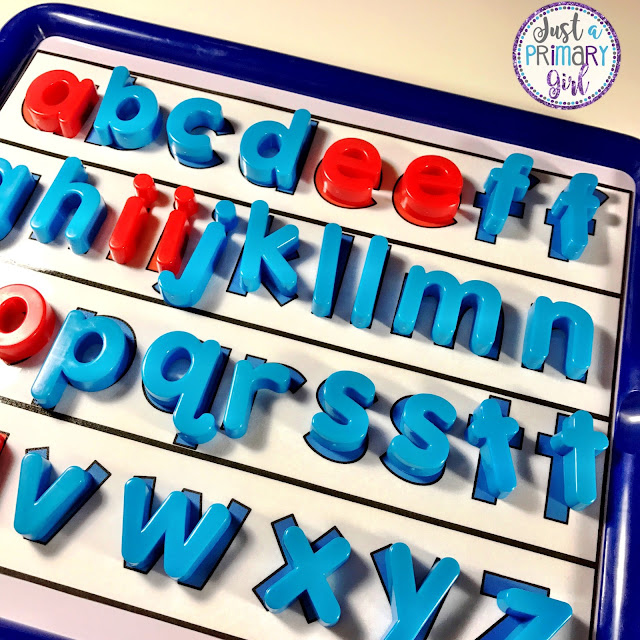
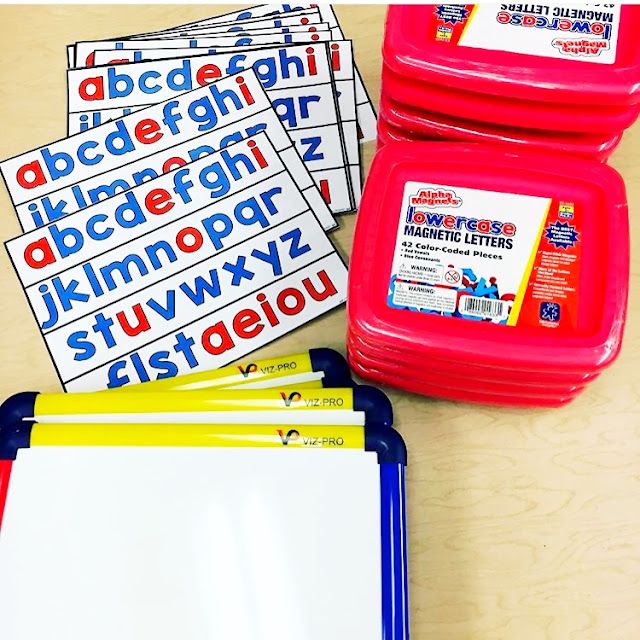
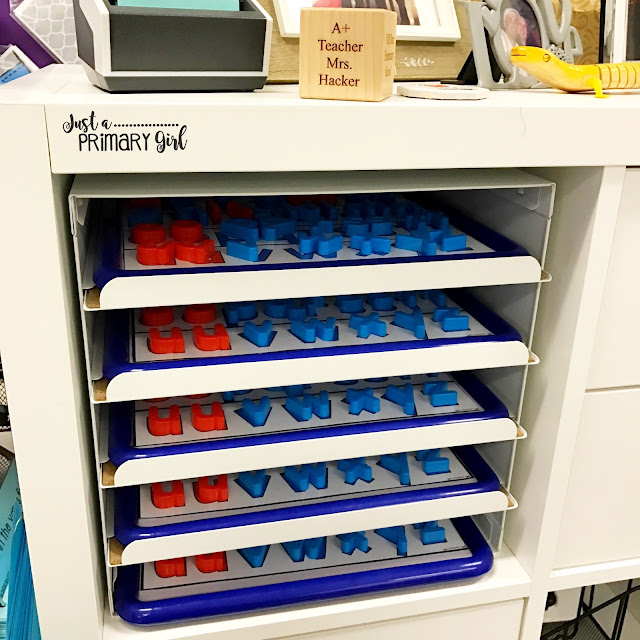
I also use these magnetic letters for students to build word families. Students have four cards. One is to put together a puzzle, then read the card, write the word, then build the word. 
Click on the picture below to see my word family task cards. 


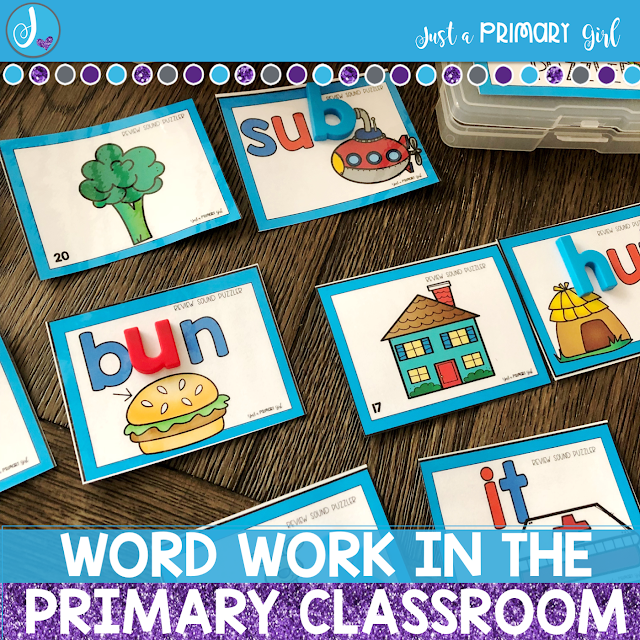
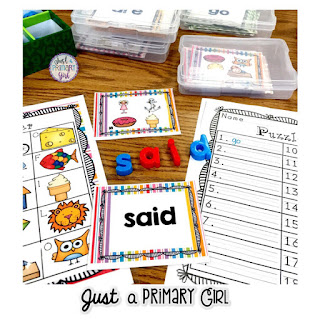
My students also play puzzler. This is another sight word game. Students pick a picture card, then, they look at the chart for the secret letter (they really can be confusing), then they have a bunch of mixed up letters. They must fix them to become a new word. 
Click below to see my differentiated puzzler sight word game. 

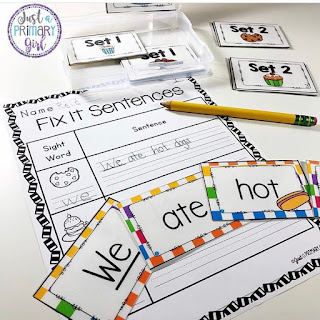
My students also use these Sight Word Fix it Sentences. 
By far one of my student's FAVORITE centers. They do so well with them. They come in pre-primer, primer and first grade. Don't worry - second grade is coming! 
Click the link below to grab them! 


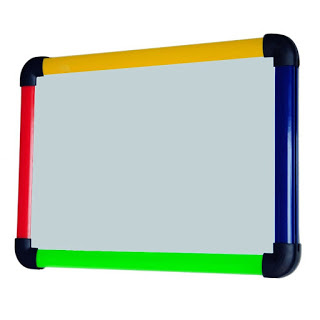
These are the boards that you can use in your room as well. Click the photo above to find these boards. 

I use this shelving system to house all of my boards(click on either photo to grab the shelving!)


Inside the drawers, you will find my fine motor and stem bins. 
my students can grab stem boxes or other fine motor activities. They also can find shoe tying center, and peg board.  Of course, they also use dollar spot erasers to make their spelling words. 

My classroom doesn't have spots for backpacks and jackets - unless you count the hooks that I trip over daily. After surgery, I just wasn't trying to trip anymore. I found these sterilite bins on amazon. You can click the picture above or here to find them. 


This is my math tub, recess, mailbox and student supply area.  
My first year teaching I bought 5 of the grey bins at the top. 
You can grab them by clicking here . They are amazing. They are solid gray plastic and match EVERYTHING.  I suggest sticking with black, grey, or blue. White does start to show kicks and dirt. I have gone from 5 bins to 12. When I want a theme change, I switch the sign (They are held on by velcro dots)
I use flexible seating in my classroom, so my students need a place to keep their spelling notebook, poetry notebook, reading books, morning work pack, center packs, and pencil bag. They take only what they need. The bottom row of bins hold all of that. They are from Ikea (shocking - right) They are the trofast. You can find them here You will need bins to go inside. 
My labels for these are from here
The purple recess bins are from here. The labels are from here
                       The end is a mailbox and is from here. Now, I know this is expensive, 
                                            but it is solid wood and will last forever! 


I keep all of my math activities inside the tubs. There are hands on activities or games.
The black six drawer bins are all connected. You can find them here

Click on the picture above to grab the glue dots that I use to hold the labels on the outside. 


Here are some other pictures of my room I thought you would all like: 

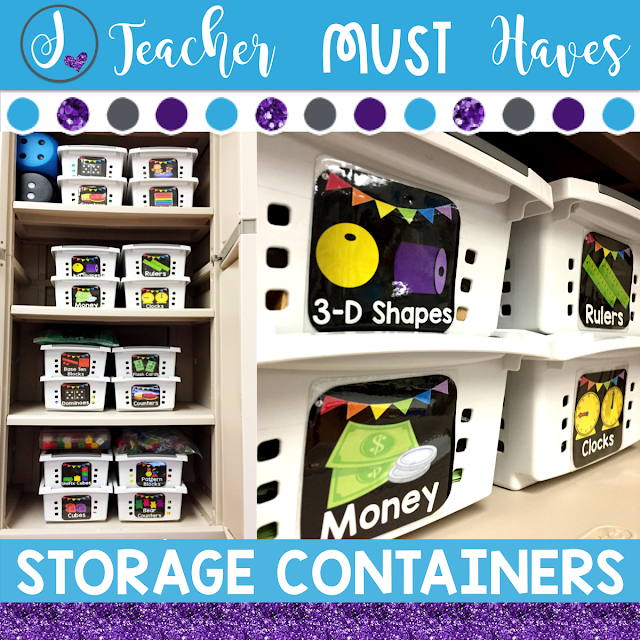
I invested in these white containers. They were a dollar each ten years ago. They have a flippable lip to stack them SUPER easy. Find those here.  I bought 30 of them. It has been 10 years and they still look like new. Not ONE has broke. Last year, I tossed them into my dishwasher and they look BRAND NEW!  If I change themes - I pop on a new themed label rather than tossing containers for new ones.  You can find these labels by clicking the picture or here.

Latch bins are KEY to hold supplies. Look at this mess under my sink before - now look how great they look. I have an index and can find anything!  Find those labels here or click the picture above.

I no longer use these on a shelf, but here is another option using a shelf you may have in your classroom.
Find the labels here.


My library is always a work in progress. You can find these bins here from Steps to Literacy. These ones have stood the test of time. You can try cheap options, but you will end up wanting quality ones. You can find my editable labels here


I hope that you enjoyed the trip around my classroom. As I update my library and student desk area, I will share more. :) 
I will also take a video classroom tour so you can see it all live. 

Pinterest Email Teachers Pay Teachers Instagram Bloglovin' Periscope Image Map
Back to Top